Doors for desks
Door-desk conversion is the best way to create extra space in a tiny house without sacrificing comfort or style. In this article, I will discuss the design elements and measurements to build a door-desk and the five steps you need to consider while converting your door into a desk. And even if you don’t live in a small home, there are many situations where (door)desks like these would come in handy: you can use it as an entryway (or hallway) desk, an office desk, or even a bedroom desk/vanity table.
Doors for desks
Ikea door desk,
desk with doors to hide monitor,
door desk kit,
ikea hackers office
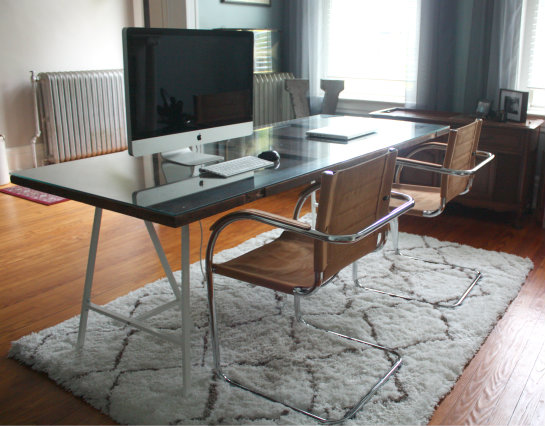
In the spirit of DIY and frugality, I decided to make my own door desk. The idea is simple: Take a flat surface, cover it with some sort of door, and attach it to a hinge. The result? A functional desk that conceals all your office clutter.
I wanted my door desk to be as inexpensive as possible, so I went with Ikea’s Billy bookcases and Lack tables. I purchased two of each and combined them into one large surface that my desktop computer could sit on top of. All told, it cost less than $50 in materials (not including tools).
Ikea door desk:
One of the most popular ways to make a door into a desk is by buying an Ikea desk and attaching it to the door. You can find several tutorials online for this, but I found this one to be the simplest. It uses common tools and materials, but it does require some skill with woodworking or power tools. If you have never used either of these before, it might be better to ask someone with experience for help.
The tutorial starts by measuring the inside of your door frame and cutting two pieces of wood that are slightly smaller than that size. You then glue them together to create one long board that will fit inside your frame and attach them using screws or nails into the frame on either side (the photo above shows how it will look when finished). Next, you need to cut three pieces of wood that are slightly larger than your window pane (or whatever piece of glass will be covering your monitor), then attach those three pieces together using screws or nails on each side as well. Once everything is attached together properly, you should have a solid base for your monitor!
Desk with doors to hide monitor
This is a desk that has a hutch attached to it. The hutch can be used for storage and concealing computer monitors. This is another example of a door desk that can be built at home by anyone with basic carpentry skills.
The desk has three doors that open up to reveal shelves for storing books, binders or other office supplies. The bottom portions of the doors are left open so you can see what’s inside.
The door desk kit comes with all the hardware needed to put it together and install it on your wall.
The door desk kit is available in two different sizes: 30 inches wide and 60 inches wide.
The door desk is a great way to hide your monitor and other things you don’t want others to see. It will give you more room on top of your desk so you can use it for other purposes.
The door desk is also very easy to make, all you need is a few tools and some wood. Read below for a step by step guide on how to build your own door desk.
Step 1: Measure and cut the wood
First measure how big you want your desk to be, then cut two pieces of wood that are about 2 cm wider than the desired length of your desk. For example if you want your desk to be 80 cm long then cut two pieces of wood that are 82 cm long. The thickness of the wood should also be about 2 cm thicker than what you want the thickness of your finished desk to be. In this case we are making a door desk so we used 4 mm thick plywood but if we wanted it to be strong enough for something heavier like an LCD screen monitor then we would use 6mm or 8mm thick plywood instead.
IKEA Desk with Doors – Amazon
Ikea Malm Desk With Doors – Ikea
IKEA Hack: IKEA LACK wall mount desk with doors
Ikea Hack: IKEA LACK wall mount desk with doors
Desk with doors to hide monitor
A door with a glass panel is the perfect solution for a small space. Not only does it look great, but it also allows you to see what’s inside without having to open it. The IKEA Ekby Valter shelf is simply attached to the wall, making it easy to install. If you’re looking for an alternative that doesn’t require any tools, check out our instructions for how to make a DIY door desk.
This inexpensive kit from Amazon has everything you need for a simple setup. It comes with four brackets (two large and two small), two sets of hardware screws and one set of plastic anchors and screws for attaching to your door. The brackets are designed for doors between 1 3/8″ and 1 3/4″ thick and create a shelf that sits about 11″ from the wall. You can also use this kit on walls if you don’t have any doors lying around.
Here are some of the best ideas for a door desk.
This is one of the most popular options, but it’s also one of the most expensive. It’s a great way to get a large amount of space at a low cost, but you’ll have to assemble it yourself. If you’re not comfortable with that, there are other options below.
This is an option if you don’t want to spend the time or effort building your own door desk from scratch (or if you’re just not good at carpentry). These kits include everything needed to build your own computer desk from scratch in about an hour or two.
The IKEA door desk is an easy, inexpensive way to add a bit of style and functionality to your home office or bedroom. You can use it as a desk, a dressing table or even as a nightstand. This project is great for people who are just learning to build furniture. The entire process takes less than 2 hours and requires only basic tools.
What You’ll Need:
1x IKEA GALANT Desk ($30)
2x Drawer Slides ($10)
1x Saw (circular or table saw)
1x Drill (with drill bits and screwdriver bit)
IKEA Door Desk
The IKEA door desk has been a popular hack for years, and it’s easy to see why. The desk, which is basically just an IKEA Besta cabinet with a door on the front, is versatile enough to work as an entryway table, a media console or even a nightstand. It’s also affordable, coming in at just $99.
The only downside to this desk is that it doesn’t have any drawers or storage space. You can add some extra storage by building some simple shelves into your unit. In fact, we’ve already seen someone who did just that!
This project is easy enough for anyone who has basic woodworking skills (or knows someone who does). You’ll need to be able to drill holes and use power tools like a jigsaw and router if you want the project to look nice and smooth — but if you’re handy enough with those tools, this project will be pretty simple for you.
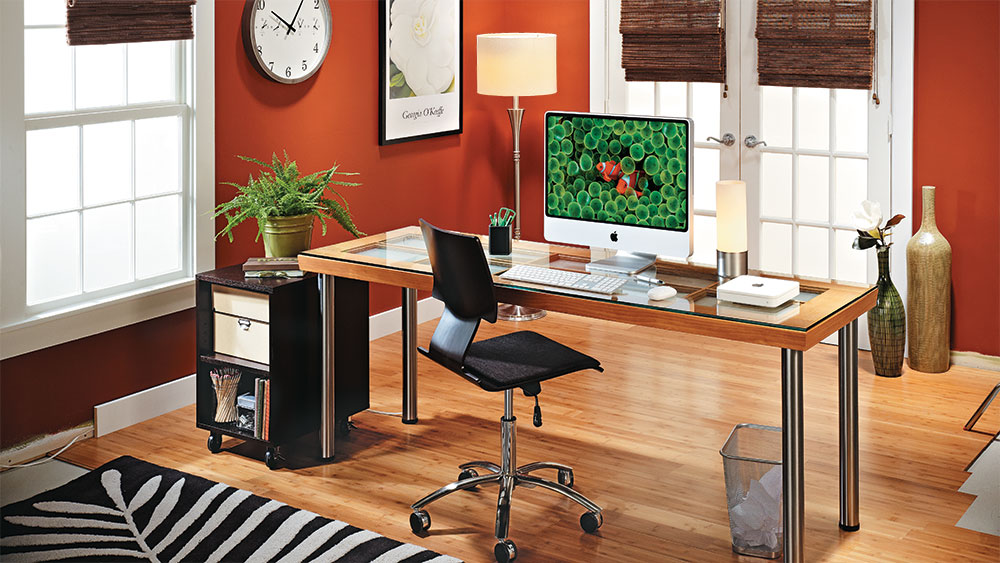
You can use this desk as a regular desk or as an office, and it is perfect for small spaces. It has a modern design and can be used as a workstation.
This table has a big surface for working on projects and reading books. The surface can be adjusted, so you can change its height easily.
The table has 2 doors that allow you to hide your monitor and other accessories behind them. It also comes with a cable management system that will help you organize the wires properly.
You can put your laptop on this desk and use it comfortably because of the padded top of the desk. You will also be able to store your keyboard and mouse inside the drawer when they are not in use.