How to build a wood fort
Building a fort made of wood is no easy task. It requires hard skills, like carpentry and engineering, but it also connects with your creative side. Whether you’re a boy who’s just entered the world of Scouting, or an adult who wants to build an in-home treehouse for your kids, this guide will lead you through the process of building your own wood fort.
How to build a wood fort, how to build a fort outside with wood, how to build a play fort out of wood, is the question I will answer for you in this post. Wood forts have a history that is as old as civilization itself, and I’m going to show you how to make one just like our ancestors did.

How to build a wood fort
If you’re looking for a fun, easy project, building a wooden fort can be the perfect solution. If you have kids, this is an excellent way to get them involved in the home improvement process. They’ll get to help pick out materials and design the fort to their liking!
Here are some tips for building your own wooden play fort:
Choose your spot carefully. You’ll want a space that’s well shaded by trees or other structures, so that it stays cool during the hot months and doesn’t get too cold during cold weather. This will also keep away bugs like mosquitoes from bothering you during playtime!
Measure out your space. You’ll need at least 10 feet by 10 feet of open space to begin building your fort. The size depends on how many people you want to fit inside and what type of play equipment you have planned for inside (such as swings or slides).
Buy materials in bulk if possible. Wood pallets are an excellent material for building a fort because they’re inexpensive and easy to work with; however, they can be hard to find at local home improvement stores due to their popularity as shipping containers and storage options for businesses and individuals alike.
How to Build a Wood Fort
Building a fort out of wood is a great way for kids to get creative and imaginative. It can be built from scratch or using materials that are readily available at home, like old pallets. A few tools and some basic instructions are all you need to get started.
Step 1
Choose the location where you want the fort to be built. It should be a place where there is enough space for kids to move around freely. For example, if you have a backyard, choose an area that has enough space so that your kids don’t bump into each other while playing inside their new creation. If you live in an apartment building, find an open area on your balcony where they can play with their friends without disturbing others in the building.
Step 2
Decide on what kind of fort you want to build. You can build a simple square frame with four walls and one door or go for something more elaborate like a castle with turrets and towers – it’s up to you! The simplest way would be to use wooden planks or boards for the walls but if you have enough time on hand, getting creative with other items would make it more interesting for kids
There are many ways to build a fort with wood, but here’s a quick guide to building one using 2-by-4s.
Step 1: Start by cutting your 2-by-4s into the lengths you want for your fort walls. The length of your walls will depend on how big you want your fort to be. Use a miter saw or circular saw to make the cuts, then sand down any rough edges with sandpaper.
Step 2: Lay out all of your boards so that they form a rectangle. Use wood glue and brad nails (or screws if you have them) to attach each board together into one large frame.
Step 3: Flip over your frame and place it on top of two sawhorses or stools. This will give you extra support as you flip it over again and begin adding more boards.
Step 4: Place a row of boards along each side of the frame first, then add another row above those boards so that each row overlaps slightly with the previous row and creates a staggered brick pattern with gaps between each brick that are wide enough for climbing through but close enough together so that no light shines through from outside
Building a fort out of wood is a great way to get creative and have fun. If you’re looking for an easy project that will keep your kids busy all summer long, then this one is for you! This tutorial will show you how to build a simple fort out of wood.

What You’ll Need
Wood 2x4s (or whatever size boards you’d like)
Nails Hammer (or other pounding device with a wide head)
How to build a wood fort
Building a wooden fort is a fun and easy project for the whole family. It can be as simple or as complicated as you want it to be. The main thing is to use lots of imagination and have fun!
Here are some tips on how to build a wood fort:
1) Get your materials together
You will need:
– Wood planks or timber, which you can buy at any hardware store (or get from lumber yards). They come in various sizes and thicknesses, so choose one that is suitable for your age group and the size of your fort.
– Screws or nails (depending on what type of wood you are using).
– Nail gun (optional). If you don’t have one, this can make things easier but isn’t essential if you are building a small fort for younger children.
2) Find out where you want your fort to go
You can build it wherever you want – in your garden, in the park or even on top of your car! Just make sure that there is enough room for all the pieces of wood. The best place is probably somewhere shady where there won’t be much wind blowing around (this might not
How to build a fort outside with wood
Build a fort out of wood pallets. This outdoor playhouse is easy to make and will provide hours of entertainment for your kids. Start by measuring the dimensions of the pallets and then cut them down to size. Next, use nails or screws to put them together. You can paint or stain the pallets if you’d like, but they’re also great as they are. Once you have everything assembled, it’s time to add some windows and doors! The best part about this project is that it can be turned into whatever you want — pirate ship, police station, castle or anything else!
How to Build a Play Fort Out of Wood Pallets
Step 1: Determine the size of your fort by measuring the length and width of the area you want to build it in. Then use a utility knife to cut down the pallets so that they are in this same general size. You can also use a circular saw or hand saw, but this can take much longer. In addition, if you’re using only one or two pallets, it might be easier to just cut them down with a utility knife.
Step 2: Once you have your wood pieces cut down to size, use a hammer and nails to attach each piece together at its corners until they form a rectangle shape. You may need help from someone else if your fort is large or heavy.
Step 3: Next, paint or stain your wood pieces so that they match each other and look like one unit instead of several different pieces bolted together. This will also help them hold up longer outdoors without rotting or splintering as easily as unpainted wood would do under these conditions. It’s also an excellent idea to add some weatherproof sealant on top of any exposed areas such as around windows or doors that could allow water in when it rains

How to build a play fort out of wood
When it comes to building a fort, nothing beats the thrill of creating something from scratch. This project is an easy one that you can do with your kids or grandkids, and they’ll love spending time in their new hideaway. The best part is that there are many different ways you can build your own fort — it’s up to you and your imagination! Here are some ideas:
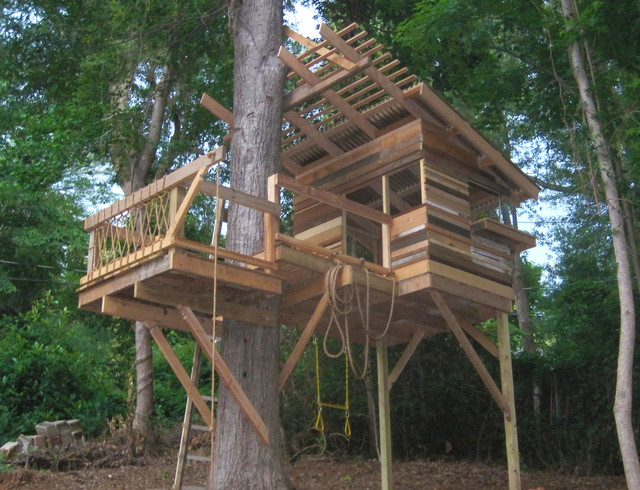
If you have a large backyard, consider building a treehouse. You don’t need any special skills or tools for this — just some basic carpentry skills, patience and time. If you’re not sure where to start, check out our post on how to build a treehouse here.
If you have a smaller yard, don’t despair — there are plenty of other ways to make use of the space around your home. Try building a sandbox or maybe even an enclosed play area by digging into the ground and covering with wood panels, which will provide shade during hot summer days and keep out bugs at night (just be sure all those spaces are sealed sufficiently so no critters can get inside).
Building a fort is a great way to keep kids entertained and out of trouble. Here are some ideas for making a fun fort out of wood.
1. Build a Fort Out of Wood Pallets
Pallets are a great cheap resource for building outdoor play structures, since they’re free and easy to find. They also come in all shapes and sizes, so you can customize your fort to fit your yard. To build one, simply lay down two pallets side by side and screw them together at the corners (or use nails if you don’t have screws). Then place another set of pallets on top, screwing or nailing them together as well. You can also add walls by attaching more pallets vertically along the sides of your structure, forming rooms within it that kids will love exploring!
2. Make Your Own Playhouse With These Plans
If building something yourself isn’t your thing, think about buying a pre-made playhouse instead. There are plenty available online, including this one from Amazon that comes with instructions on how to assemble it yourself if needed (or hire someone to do it for you).
A simple play fort can be made from two sheets of plywood, two pieces of 2×4 lumber and some hinges. You’ll also need some screws, a saw and some nails.
First measure your plywood sheets, then cut them with the saw. You’ll want to make sure that your 4×8 sheets are cut down to 4×6 so that you have enough room to fold one sheet over the other.
Next, screw one sheet of plywood onto each side of the 2x4s using four screws in each corner.
Now you can screw on your hinges at the top of each piece of wood so that they will fold up when closed.
For added fun and adventure, you can add a handle on one end of each piece of wood so kids can carry around their own little fort wherever they go!