How to build a counter
If you have any sort of internet business, the first thing you should get is a visitor counter. In this post I will show you how to make your own counter in 5 easy steps. Counter Builder is one of the best online counters on the web. Serve your customers better and increase your sales now!
How to build a counter bar, or a counter frame. Learn about the basics of cabinetry and joinery along with the different types of counters. Design or remodel your kitchen by learning how to build a cabinet package and everything you need to know to put together your own counter.

How to build a counter
If you’re looking for a project that’s easy to build and can be completed in a weekend, then building a counter bar might be just what you need.
The first step is to create the frame for your counter bar. You can do this using two-by-four boards or any other kind of wood you want. As long as it’s sturdy enough, it doesn’t matter how big or small your frame is.
Once you have your frame built, attach it to the bottom of your wall using screw hooks or nails. Make sure that the edges of your frame are flush with the edge of the wall so that no gaps are left between them when it comes time to paint them.
The next step is to attach some trim pieces along the top of your bar area so that they don’t look unfinished when they’re painted white or another color of your choice. This will also help make sure that there aren’t any gaps between the top of your counter and where it meets the wall behind it either!
Countertops are one of the most important features in the kitchen. They define the look and feel of your space, and they can be functional too. The most common countertop material is granite, but there are many other options available.

If you want to know how to build a counter, you’ve come to the right place! In this post, we’ll show you how to build a bar with a granite top. This project will require basic carpentry skills as well as some knowledge of plumbing and electrical work.
Materials Needed:
Granite slab of desired size (roughly 4’x8′) or tile sheets (roughly 8″x12″)
2x4s (quantity depends on size of bar)
Crown molding (quantity depends on size of bar)
Drywall screws or nail gun
Wood glue
This DIY project is a great way to build a counter that can be used as a bar or a buffet. The idea is to build the frame and then add the countertop.
The frame is made from 2x4s, which are very sturdy for their size. The bars on top of the frame will give you some extra storage space and make it easier to rest your drinks on them when standing at the counter.
The whole thing costs less than $100 in materials, so it’s not a big investment, but it gives you a lot of extra space in your kitchen or dining room!
It is a very easy project. You can build a counter in 2 days.
First of all, you need to prepare the materials: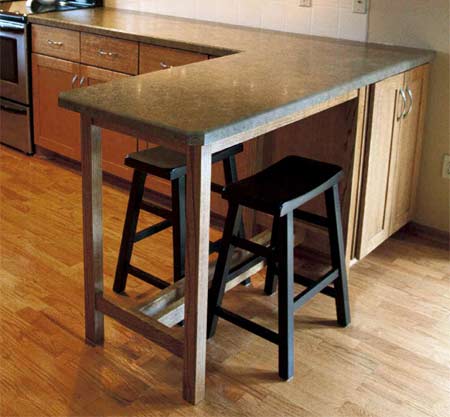
1. Plywood – 1 sheet 20 mm thick
2. Wood glue (paintable)
3. Wood glue (non-paintable)
4. Screws and nails of different lengths and diameters, depending on the type of material you’re using (wood or metal).
5. A saw, clamps and other tools needed for cutting and fixing the material together
Filing the countertop edges.
Now that you have your countertop, it’s time to file the edges. This step is optional, but it helps to make the counter look more professional.
First you need to find a good straight edge (piece of wood) and put on some safety glasses. Then take a file that matches the diameter of your countersink bit and use it to file down all of your edges (make sure there are no sharp corners).
Next is cutting your glass for the top piece. You will want to cut one piece of glass larger than your table top so that you can set this piece in on top of the table and then put a second smaller piece on top of it so that they overlap by about 1/8″ or so (this will allow space for any epoxy glue). This allows you to keep from having any gaps between the two pieces if there were any minor imperfections during cutting.
After cutting them both out, place them together and mark where they should go on your tabletop. Then use a jigsaw or circular saw to cut out a hole large enough for both pieces of glass to fit through without overlapping each other too much (again
How to Build a Counter Frame
Building a counter frame is not as hard as you might think. You can build one in just a few hours, using basic materials and tools. Here’s how:
Step 1 – Mark the Top and Bottom of the Counter Frame
Use a measuring tape to mark the top and bottom of your counter frame on the wall. The top should be about 12 inches from the ceiling, and the bottom should be at least 18 inches from the floor. You may need to adjust these measurements depending on your particular situation.
Step 2 – Fasten Hangars to Wall for Hanging Counter Frame
Fasten hangers on each side of your counter frame so that they can be hung from screws in your wall. The hangars should be spaced evenly apart at least two inches apart, so that they will fit snuggly into the screw holes on each side of your frame.
Step 3 – Hang Counter Frame From Hangars on Wall
Hang your counter frame by putting screws through each hangar and into drywall or studs behind it (depending on where you live). Next, fill in any gaps between hooks with drywall spackle or putty until both sides are level with each other
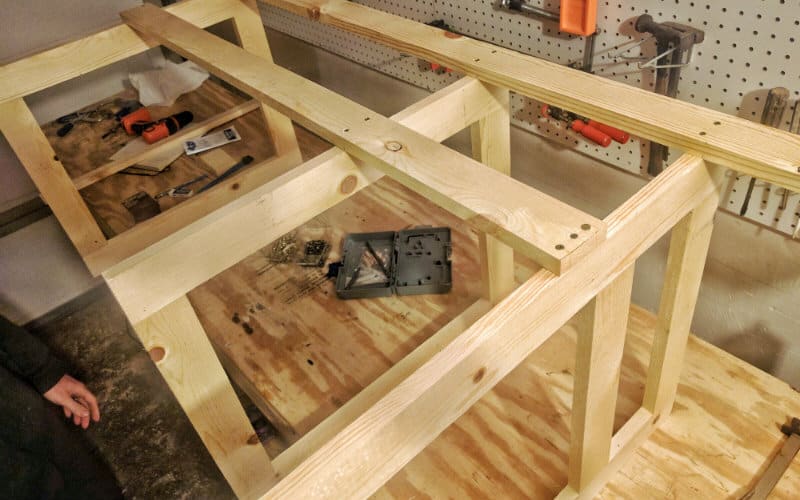
When building a counter frame, you need to make sure that the structure is strong enough to support the weight of the slab and any additional items, such as sinks or stoves. The best way to ensure this is to build a frame that is made out of 2×4 lumber.
Step 1 – Cut the Wood
The first step in building a counter frame is to cut all of your 2x4s into pieces that are 32 inches long. You can use a circular saw or miter saw to make these cuts. Make sure that you have enough wood left over so that you can cut two more pieces at 46 inches long. These will be used as supports for your countertop.
Step 2 – Assemble Your Frame
Assemble your frame by placing one 46-inch piece on top of two 32-inch pieces. Secure these together using wood screws and glue. Attach another 46-inch piece at an angle so that it touches both sides of the horizontal piece, then secure it with screws and glue as well. This forms an L shape with one end longer than the other. Repeat this process until you have four separate L shapes connected together with their corners touching each other exactly like in Step 3
Building a counter frame is an easy way to add extra storage or counter space. It’s also a great way to add personality to your home if you’re looking for something different than the standard, boring counters that come with most houses.
The easiest way to build a counter frame is by using 2x4s, which are readily available at any hardware store. The 2x4s can be cut into smaller pieces depending on how large you want your countertop to be. For example, if you want a countertop that is two feet wide and five feet long, then you would need eight 2x4s that are each two feet long.
The next step is attaching the 2x4s together using plywood as spacers between each board. Make sure that the spacers are evenly spaced between the boards because this will help ensure that your countertop has straight lines when it’s finished being assembled.
Once you’ve attached all of the pieces together with spacers and screws, sand down any rough edges so that they don’t hurt anyone when someone sits down on them or leans against them for support while working at their computer desk or eating dinner at their kitchen table.
Counter frames are a great way to add an accent to a room or build a bar or counter for your kitchen. The frame itself can be made from wood, metal or plastic and come in different sizes depending on the type of work surface you need.
Here’s how to build a counter frame:
1. Cut the wood according to the instructions in the kit and screw the pieces together using wood screws.
2. Apply wood glue and clamp together while it dries overnight.
3. Sand all edges smooth with fine sandpaper (150 grit).
4. Stain or paint as desired – use oil-based stains if you want to seal them with polyurethane, water-based stains if you do not intend to seal them with polyurethane.
5. Apply two coats of polyurethane sealer (as per manufacturer’s instructions) and allow each coat to dry completely before adding another coat
If you’re looking to build a counter frame, we’ve got the plans, pictures and instructions to help get you started.
You’ll need the following materials:
8-foot lengths of 2×4 lumber
2-inch exterior screws
Countersink drill bits for wood and metal (optional)