How to build a rope ladder
how to build a rope ladder without wood, how to build a rope ladder for treehouse, how to build a rope ladder for fire escape, how to build a rope ladder with paper,
Rope ladders have been used for more than 30,000 years – as far back as the Stone Age. They are lightweight, are less costly to make than wooden ladders and can be easily carried in a backpack. Ladders allow access to hard-to-reach areas when stakes or poles aren’t available, and they can be multipurpose: a simple rope ladder can also be used to rig up a clothesline or line a tent.

How to build a rope ladder
Wooden ladders are a common sight, but they’re not the only option. In fact, if you’re building your own ladder and using wood, you’ll need to make sure that it’s the right type of wood for the job. If you have access to steel or aluminum, though, then a rope ladder is an excellent choice.
Rope ladders can be used for all sorts of purposes, from climbing trees to reaching high places in your home or garden. They’re also useful for creating a quick exit when disaster strikes. Here’s how to build one:
Step 1: Choose Your Materials
The first thing you need to do is decide what kind of material you want your rope ladder to be made out of. You can choose between nylon and hemp rope if you want something that’s strong but soft on the hands, or jute or sisal if you want something more durable but rougher on the skin.
If you’re planning on using your rope ladder outdoors, then it’s best to use natural fibers like hemp or jute because they’ll be less likely to rot in wet conditions than synthetic fibers such as nylon would be. If this isn’t a concern for you then
Rope ladders are a practical way to get up and down from places, but they don’t have to be made from wood. You can use rope to build a ladder that’s nearly indestructible and can be used for any number of things: treehouses, boats, tall buildings or even for climbing mountains.
Rope ladders come in all shapes and sizes, depending on how you want to use them. The basic design is simple — two pieces of rope tied together at intervals — but there are many ways to customize your own version.
Step 1: Get Your Materials
You’ll need two lengths of 550 paracord (parachute cord) — one longer than the other — and a few wooden dowels or sticks. If you’re using dowels, they should be about 3 inches long and 1 inch wide; if you’re using sticks, they should be about 4 inches long and 1 inch thick. You’ll also need some large nails or fasteners sized appropriately for your rope thicknesses.
Step 2: Tie Your Knots
The first step is to tie knots in both ends of each piece of rope so that the knot will hold its place when you pull on it later on down the line. Make sure these knots are tight

Building a ladder is one of the most basic DIY projects. Whether you need to hang a light fixture or install some shelving, you can make use of this simple DIY project to get the job done.
In this tutorial, we’ll show you how to build a rope ladder using just two pieces of wood and some rope. The best part is that you won’t need any tools! If you don’t have any rope on hand, you can use twine or even yarn in its place!
Step 1: Cut Your Wood Pieces
Cut two pieces of wood into 4-foot lengths (2 feet per piece). You can use almost any kind of wood for this project; it doesn’t matter what kind as long as it’s sturdy enough to hold up over time!
Step 2: Slide One Piece Through the Other
Slide one piece through the other so that they are connected side by side with no gaps between them (you should now have one long piece of wood). Make sure that the ends are aligned with each other so that both sides are equal lengths.
Step 3: Attach Your Ladder Stoppers
Rope ladders are one of the oldest forms of climbing equipment. The ancient Romans used them to scale walls and attack enemies during warfare, and they’re still in use today. The basic idea is simple: you use rope to create steps that you can climb up or down.
Rope ladders are typically made from three lengths of rope, which are secured together with knots at either end. The most common type uses a square knot, which creates a secure attachment point at the top and bottom of each rung.
If you’re building a rope ladder for yourself or a friend, here’s how to make your own without needing any special tools or materials:
Step 1. Find three ropes that are approximately the same length (about 3 feet/1 meter). You can use whatever kind of rope you want — natural fibers like cotton and jute will be more comfortable to climb on than synthetic materials like nylon or polyester. If you can’t find any long enough for your needs, try cutting them down into shorter lengths before starting your project!
Step 2. Tie each end securely around something sturdy — if possible, choose something that won’t move too much when weight is applied to it (like a tree branch
Rope ladders are the simplest form of climbing apparatus. They can be constructed of any type of rope, but nylon is the most common. The basic design consists of a series of horizontal rungs tied to a central webbing or pole with an overhand knot (see Figure 3-16).
Rope ladders come in many lengths and sizes, but they are usually limited by the length of available rope. They are designed to support only one person at a time; they cannot be used if more than one person is attempting to climb them at once. Rope ladders should not be used on any surface that may be slick or unstable.
To construct a rope ladder:
1. Tie an overhand knot at one end of your rope to serve as a weight or anchor point (Figure 3-17).
2. Tie two half hitches around the pole or tree trunk about three feet from your weight point, using smaller loops in the same manner as shown in Figure 3-11 (page 128). These will serve as handholds for climbing up and down your ladder.
3. Tie another half hitch around your weight point, then continue tying hitches up the rest of the ladder until you reach
How to build a rope ladder without wood,
Rope ladders are a great way to get up into your treehouse. They are easy to install, and they can be built without any special tools or skills. The only real drawback is that they may not be as sturdy as you would like. If you’re looking for a more stable or permanent solution, consider using wood instead of rope.
Step 1: Buy the right rope
The first thing that you’ll need is some rope. Any type will do, but make sure that it’s strong and sturdy enough to support your weight and that of anyone else who might be climbing the ladder at the same time. The best option is nylon rope because it’s lightweight, strong and durable. However, there are other options such as polypropylene and Kevlar that offer similar properties but at a higher price point. In addition, if you want something with more visual appeal than just plain black or white ropes then consider buying colored ones instead; there are plenty of colors available from most hardware stores or online retailers like Amazon (see Resources).
Step 2: Cut the Rope Into Sections
Next step is to cut the rope into sections so that each one makes up one rung on
How to build a rope ladder for treehouse
Rope ladders are easy to make and they’re much safer than using a ladder. This is an excellent project for young people who need to learn some basic knots.
Step 1: Decide on the length of rope you will need. This will depend on how high you want to go, but I’d say that 6-8 feet would be a good place to start. Also decide if you want to use two ropes or one. Two ropes is safer and works best if there is a lot of movement in the tree. You will also need some additional rope (about 50 feet) for the steps and handholds, so consider this when buying your line.
So you want to build a rope ladder for your treehouse, but you don’t have the tools or skills to make one out of wood. No problem! Here’s how you can do it without any tools at all.
Rope ladders are great for kids’ treehouses because they’re easy to climb and they’re inexpensive. They also look cool and add a bit of whimsy to your structure, which is always a plus in my book!
First, you’ll need some rope. The best type of rope for this project is called paracord — it’s strong and flexible, so it won’t snap or break under pressure like a lot of other types of ropes might do (such as nylon). You can find paracord at most hardware stores or on Amazon — just be sure that it’s rated as 550-pound test, which means it will hold up to 550 pounds before breaking. For an average-sized kid, this should be plenty strong enough — but if they’re very small or if there are multiple people on the ladder at once, consider getting stronger rope.
Next, measure out how long each rung needs to be; this depends on how high up your treehouse is going to be and how far apart the rungs need
How to Build a Rope Ladder for Treehouse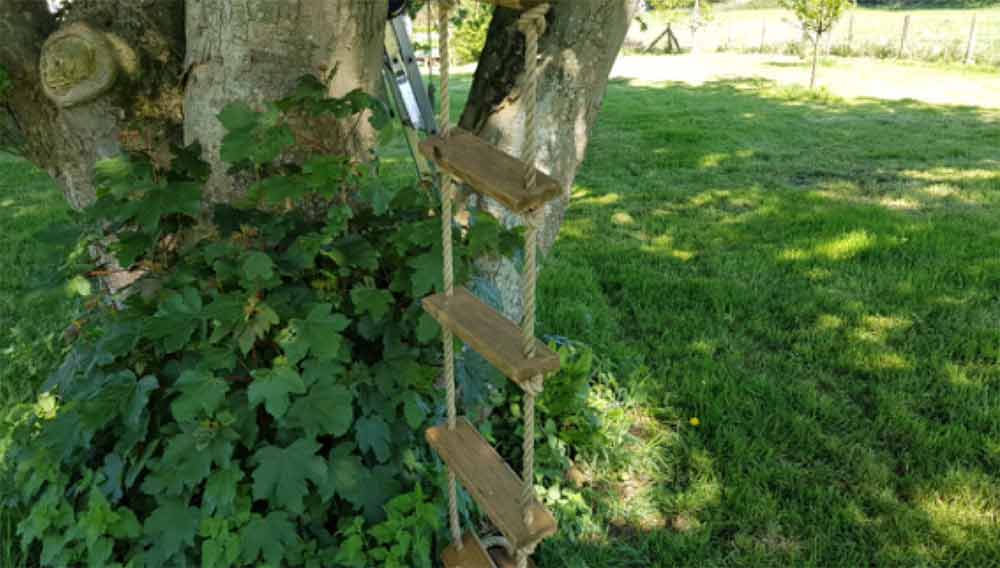
A rope ladder is a great way to access your treehouse, but if you don’t have the right tools, it can be a little tricky. This guide will walk you through everything you need to know about building your own rope ladder.
Materials:
– 1/2″ Manila Rope (about 4 feet per rung) – Can be found at hardware stores and online (Amazon)
– Carabiner – For attaching the rope to the tree-house platform
Here’s a quick guide to building a rope ladder for your treehouse.
1. Cut the rope into four pieces of equal length. We used 2-inch polypropylene rope, but you can use any kind of climbing rope that you want.
2. Thread the end of one piece through one of the holes in your knotless anchor device (or ring). Tie an overhand knot at the end of the rope.
3. If you’re using a ring, slide it up over the branch and attach it to another branch with another overhand knot or two figure-of-eight knots. If you’re using a knotless anchor device, attach it to another branch with two figure-of-eight knots or two more overhand knots. Make sure that you tighten these knots well so that they don’t slip through their loops or holes when someone climbs on them!
4. Repeat steps 2 and 3 with each piece of rope until all four are attached in this way at one end (see photo).
5. Attach these four ropes together by making an X out of them — i.e., put one piece through two other pieces like this:
6. Tie an overhand knot at