How to build a shed ramp
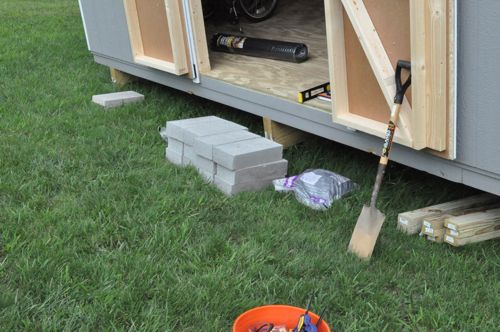
How to build a shed ramp with pavers. I have been building a 12×12 shed for my power tools and it was time for me to keep the rake out of my storage area. It led me to thinking how I could get the mower into that space without damaging anything. That is when I decided to build a ramp made of pavers. There are many ways you can build a shed ramp if you want to spend the money but pavers seem to be the easiest and fastest way when you’re on a budget.
A great way to increase your online authority is to build a shed ramp with pavers. If you follow my instructions and build an outdoor shed ramp then you will learn how easy it is to build a shed ramp for your home. At the end of this guide I’ll show you exactly what the end result should be, so you will know when the shed ramp is complete.

How to build a shed ramp
Building a shed ramp is a great way to make your shed more accessible to those who have trouble getting in and out of the building. A ramp can also help you avoid having to use stairs, which could be difficult for people with mobility issues. In this article, we’ll show you how to build a shed ramp with pavers so that you can start enjoying the benefits of having one today.
The best way to build a ramp for a shed
If you’re looking for the best way to build a ramp for your shed, then we recommend using pavers as the material for your treads and risers. Pavers are sturdy, durable and easy to install, making them perfect for outdoor applications like this one. You can also choose from many different colors and styles of pavers, so you can create an attractive ramp that matches the rest of your landscaping as well as possible.
How to build a shed ramp step by step
When building your own shed ramp with pavers, there are several steps that need to be taken before you begin construction:
Measurements: Before starting any work on your new shed ramp, make sure that
The best way to build a ramp for a shed is to use pavers. Pavers are great for shed ramps because they’re durable, easy to install and can be used in any weather condition. Plus, they look nice!
Here’s how to build a shed ramp with pavers:
Step 1: Measure the height of your shed
Measure the height of your shed and add one inch. This will be the height of your ramp. For example, if your shed is 8 feet tall, you’ll need a 9-foot ramp.
Step 2: Dig holes for pavers
Dig holes for each paver along your measured line. The typical depth of a paver is 6 inches but this can vary depending on the size of the paver and how much weight it’s expected to carry. Make sure each hole is wide enough so that when you stack them together they create one solid surface that won’t move around when someone walks down it.
A shed ramp is an excellent way to provide access to your shed. The best way to build a shed ramp is with pavers. This is because they are easy to install, durable and look great.
Here’s how to build a ramp for a shed:
1. Make sure that you have the right tools and materials before starting. You will need paver stones, sand, gravel and cement as well as a shovel and a wheelbarrow.
2. Measure out the position where you want your ramp to be located, then mark out the area with chalk line, making sure that it’s square in shape.
3. Dig out about 4 inches of soil from the marked out area using your shovel, then fill it back in with gravel and sand mixed together thoroughly until level with the rest of the ground surface around it (see image above). You can use any kind of gravel that you like but make sure that it’s not too big otherwise you’ll end up with large holes in your finished paving once installed!
If you’re looking for an easy, affordable way to make your shed more accessible, a ramp is the perfect solution. A ramp can be built with pavers or wood and it’s a great project for both the beginner and experienced DIYer.
In this article, we’ll show you how to build a shed ramp with pavers. For this project, we decided on a 4-foot wide by 6-foot long ramp. The steps are simple enough that you could make them shorter if needed.
Ramps for sheds come in all shapes and sizes, so if you have a large or small structure, this design will work for you! Just follow these instructions and use our free shed plan when building yours:
How to Build a Shed Ramp With Pavers:
Step 1: Measure Your Shed
The first step is to measure your shed so that you know how long to build your ramp. Measure from the ground up until it reaches where the floor of your shed will be (don’t forget to account for any footings or foundation). You’ll also want to measure across at its widest point (which will likely be right in front of the door). This will help determine how wide your ramp needs
Building a shed ramp is an easy project that you can do in a weekend. The best way to build a ramp for a shed is to use pavers and not wood. Wood will rot over time and eventually need to be replaced. Pavers are durable, easy to clean and will last for years.
Materials Needed:
Pavers, which are available at most home improvement stores or masonry supply stores
Landscape fabric (optional)
2 x 4s (optional)
The best way to build a ramp for a shed is to use concrete paver stones, but you can also make a wooden ramp or use bricks. A shed ramp can be used to make the access to the shed easier and safer. The most important thing when building a shed ramp is making sure it is level and strong enough for heavy equipment.
How to build a shed ramp step by step
When building your own shed ramp, you will need some basic tools such as:
Hammer
Wire brush
Shovel or trowel (depending on how much digging you’re doing)
Leveler or straight edge (if needed)
How to Build a Shed Ramp With Pavers
Building a shed ramp is one of the most common projects you will encounter when building a shed. A shed ramp can be constructed using many different types of materials, but I like to use pavers because they create a very durable and long-lasting ramp.
In this article, I’ll show you how to build a shed ramp with pavers.
Step 1: Create Your Plans
The first step in building your shed ramp is to figure out what size and shape you want it to be. You can do this by measuring the length, width and height of your shed’s floor surface and then determining how steep the slope will be (see below). From there, you can draw up some plans that include all of these measurements so that you know exactly what you’re working with before starting construction on your project.
Step 2: Lay Out Your Pavers
Once you know exactly how large your ramp needs to be, it’s time to start laying down your pavers! Start by laying out all of your pieces individually on top of each other so that they form a rectangular shape (the same shape as your plan). Then take a piece of chalk and mark where each
If you have a shed that’s short on space, consider adding a ramp to make it easier to access the roof. This also makes it possible to store additional items in the shed that are too tall to fit inside.
If you’re looking for a cheap way to build a shed ramp, consider using pavers. They’re durable and easy to install, but they don’t come with any warranties or guarantees.

Here’s how to build a shed ramp using pavers:
1. Choose your site and materials. Before you start building your shed ramp, take some time to think about where you want it located and what materials will be best for your project.
2. Lay out your pavers into an outline of the shape of your ramp. Make sure there’s enough room for people to walk on each side of the ramp without having their feet overlap those of other people walking up or down the stairs at the same time (generally about 5 feet should be plenty).
3. Drill holes through each paver at its edge with a hammer drill bit (you’ll want them spaced roughly every 12 inches along each side). These holes are where you’ll screw down each paver into its place on top of one another as well as into
Building a shed ramp is a great way to make your shed more accessible and usable.
If you have a shed, there’s a good chance that it’s located at the back of your property, or very close to it. This can be challenging if you need to get into your shed on a regular basis. You may not want to lug all of your tools out of the house every time you need something from the shed, so having a ramp that makes it easier to get in and out of your shed will come in handy.
Building a ramp is also helpful if you have someone who uses a wheelchair or mobility device. It allows them access to this part of their yard without having to navigate uneven terrain or large steps.
You don’t need any special skills or tools to build a ramp for your shed, but there are certain things you’ll want to keep in mind as you plan out how and where you want to build it.
So, how do you build a shed ramp?
Step 1: Measure the height of the steps you want and cut the wood to length.
Step 2: Lay out on the ground where each step needs to go, then measure down from there and mark out where your first step will go.
Step 3: Attach the first step with screws or nails. Make sure that the top of each step is level with the top of the previous one and that none are higher or lower than others.
Step 4: Attach another piece of wood at right angles to form a T shape and repeat this process until you reach your desired height.
Step 5: Cut a piece of plywood to size as needed for covering your shed’s door, then attach it using hinges or screws so that it can be opened easily later on when needed