How to build a simple wall shelf
Have you ever needed a wall shelf, but didn’t have any brackets? I recently found myself in that very situation. In this tutorial I’ll walk you through how to build these wall shelves myself, without having to buy anything extra.
So, you want to learn how to build wall shelves? Or, maybe you’ve already got some wood lying around and are ready to get started. Either way, it’s time to make some shelves! I’m going over in detail how to build wall shelves on any wall you have in your home. Whether it be a full wall or just a partial wall that could use some shelving.

How to build a simple wall shelf
Building a wall shelf is easy and can be done in just a few hours. This tutorial will show you how to make a sturdy, beautiful shelf that will last for years.
What You’ll Need
1/2″ plywood (or other strong wood) for the shelf base
1/4″ plywood or MDF for the top of the shelf
Wood glue or carpenter’s glue
16 penny nails or screws for attaching the sides to the base
4 L-brackets (for attaching the top of the shelf)
You can build a simple shelf for the wall without brackets, or with the help of a few brackets. You can also make the shelves out of wood or buy pre-made ones.
Here are some instructions for building your own wall shelf:
1. Measure the height of each shelf and write this measurement down on a piece of paper.
2. Measure the width of each shelf and write this measurement down as well. The widths should be equal to each other if you’re making multiple shelves, otherwise they can be different sizes depending on how many shelves you want to make and what size they need to be in order to fit on top of each other properly.
3. Cut two pieces of wood to match the measurements you wrote down in step 2 above; these will be used as your shelf supports. Cut two more pieces of wood (or use the same ones) that are twice as long as your shelf support pieces; these will be used as cross beams for connecting your shelf support pieces together at right angles in order to create an X shape that looks like this: 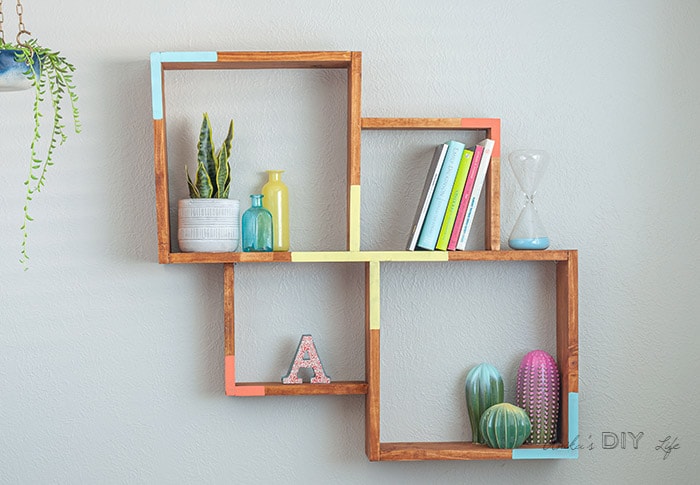
4. Place one cross beam in between two shelf
A wall shelf is a great way to showcase your favorite books, photos, and other items. Whether you’re building shelves for your home or office, here’s how to build them without brackets.
If you’re building a shelf for your own home, you might want to consider using tongue-and-groove plywood or particleboard as the base material. These are inexpensive options that can be painted or stained any color you like. You can also use solid wood if you prefer. Solid wood will look nicer but cost more than plywood or particleboard.
When building the actual shelf, make sure it’s at least 6 inches deep so that when you put things on the shelf they don’t fall off easily when bumped. If possible, make sure each side has at least two supports so that there are no gaps between them where things could fall through (looking at you, cats!).
Building a wall shelf is a great way to add extra storage space in a room. And, if you want to hang your television, you can do that too!
Wall shelving can be built using materials like wood or metal. Both are strong and durable materials that will last for years if properly maintained.
The most important thing when building your own wall shelves is to make sure they are level and plumb. This will ensure that they remain straight while holding their loads evenly. If they aren’t level and plumb, they can buckle or bend under their load which could cause the shelf to fall off the wall or collapse entirely.
To build your own wall shelf, start by measuring the length and width of the area where you want to place the shelf. Then measure the height between where you plan to mount it and the floor below it (this is called its “depth”). Use these measurements to buy lumber at your local home improvement store (most will cut it down for free). Once you have purchased enough lumber for all sides, it’s time to start building!
For this project we’re using pine boards because they’re inexpensive but still strong enough for our purposes (they’re actually rated as “structural” grade). You’ll need two 2×4
this is a quick and easy project that can be done in under an hour.
it is a perfect way to display your favorite books, photos and keepsakes.
The shelf can be built in any size or shape that you want. It also makes a great gift!
A wall shelf is a great way to display all of your favorite things. It can be built out of any material, but most people choose wood because it’s easy to work with and looks great in any room. If you want to make your own, here are some tips and tricks for building a shelf without brackets.
Start with lumber
The first thing you’ll need is lumber. You can use any type of wood that’s available at your local hardware store, but we recommend pine or poplar because they’re inexpensive and easy to work with. If you want to build something fancy, like an arched shelf or something with multiple levels, consider using plywood instead of solid lumber for strength and stability.
Measure twice, cut once
Once you’ve chosen the lumber for your project, measure each piece carefully so that everything fits together perfectly when it comes time to assemble it all into a finished product. If possible, start by cutting boards into smaller pieces so that they fit better into the space where they’ll eventually go on the wall. This will save you time later on when attaching them together with nails or screws
How to build a wall shelf out of wood
What you’ll need:
Wood – I used poplar because it’s inexpensive and soft enough to cut with hand tools. You can use any kind of wood you like, but I recommend avoiding hardwoods like oak or maple. They’re too expensive, and they’ll be difficult to work with your handsaw, drill and screws.
Drill & bits – You’ll need the proper sized drill bit for your screws (3/4-inch for #4 screws). I also recommend a cordless drill because it will make your life much easier (all my power tools are cordless).
Sawhorses – These aren’t strictly necessary, but they will make the project go much quicker and easier. They’re also useful for working on other projects in your shop when you don’t have a table saw or miter saw available.
In this article, we will discuss how to build a wall shelf out of wood. The process is simple, and you can do it yourself at home. However, before you start the project, make sure that you have all the tools needed for the task. These include a sharp knife, a marker pen, screws and drill machine.
In order to build this shelf, you need to first measure the length of the board with a ruler. After measuring your board, mark its edges with a marker pen. Now cut it with a sharp knife along the lines marked on it by yourself. This way you will get two pieces of wood that are equal in length and width but different in shape due to their different angles (one piece has an angle while the other is straight).
Now using two clamps attach these pieces together so that they form one long shelf with an angle at one end and straight at another end. After attaching them together use screws or nails to hold them firmly together in position.
To build a wall shelf, start by measuring the wall where you want to hang the shelf. Make sure it’s level so your shelf will be straight and stable.
Next, measure the depth of your shelf and cut two pieces of wood that are about 1/4 inch wider than that measurement. The extra width will allow room for the brackets and screws to hold them together.
You can use any type of wood for this project but pine or cedar works well because they’re inexpensive and easy to cut. Also, if you’re using pine or cedar, make sure you paint or stain it before assembling your project so that it doesn’t look unfinished when you’re finished with it.
Once you have all your pieces ready, lay them out on a flat surface according to the size of your wall. Then screw in some brackets to hold them together securely and evenly spaced apart from each other so they look like one long piece when hanging on the wall.
Wall shelves are a great way to add storage space to your wall. They can be used as bookcases or simply to display decorative items. The only downside to wall shelves is that they are often expensive, especially if you want a high quality piece of furniture.
With these instructions, you can build your own wall shelf without spending a lot of money on materials or hiring someone else to do it for you. The end result will look like it came from the store and not from your garage!
Step 1: Gather Materials
The first thing you will need is an old dresser or other piece of furniture that has been collecting dust in your garage or attic. You can usually find these at yard sales or on Craigslist for very little money, so don’t worry about spending too much on this project.
You also need some tools:
Hammer
Saw (either power saws or hand saws work fine)
Sandpaper (optional)
Drill with bits (optional)