How to build a slant roof shed
In this article, we will show you step by step how to build a shed roof with overhang. As a beginner, you don’t necessarily have to use tools such as jointer or table saw. A rafter square alone is sufficient for laying a perfect ridge in order to start the roof construction project.
A shed that is slanted instead of flat gives you a lot more space for storage and increases your total square footage. This guide explains how to build a shed roof with overhang and can be used in virtually any shed construction regardless of materials.

How to build a slant roof shed
This is a very easy way to build a shed roof. This can be done by any person who’s handy with tools and have some experience.
Building a shed roof with overhang, is the cheapest way to build a shed roof.
The first step is to lay out the rafters on top of the walls and cut them to length using a power saw or handsaw. You don’t want to cut them too long, because they need to fit between the wall plates and overhang the front by at least 3 inches (75 mm).
The next step is to attach each rafter to two wall plates using metal strap hangers. The straps should be positioned so that they’re directly above where each rafter will connect with another one (see picture).
After that, you’ll need to cut 2x4s into joists (horizontal support beams) that are about 2 feet longer than your walls are wide. Attach these joists by nailing them between pairs of rafters where they meet in the middle; this will keep your walls from spreading apart when you add insulation later on.
Building a shed roof with overhang is a simple process. Use a framing square and chalk line to mark the rafters, then cut them to length. Mark the locations of the rafters on the top plate and cut them to length, using a circular saw. Attach the rafters with 16d nails or 3-in. screws driven through pilot holes.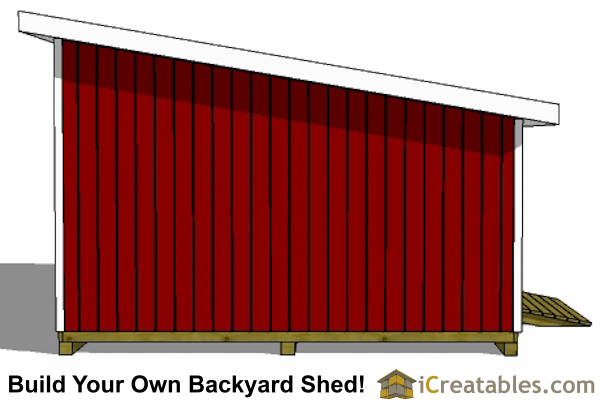
To build this shed, you’ll need:
1/2-in.-thick exterior plywood for the floor
4x4x8 pressure-treated lumber for the walls (4)
1x4x10 pressure-treated lumber for the front and back wall plates (3)
1/2-in.-thick OSB sheathing for the gables (2)
12/2 NM cable wire for electrical service
Hinges (6)
A shed roof with an overhang is a great way to use your available space. You can build this type of shed in any size and it can be a good solution if you don’t have the space for a full-sized building. The best thing about this type of shed is that it works well in many situations and it’s easy to build.
Building a shed roof with an overhang is not difficult, but there are some things you need to know before starting the project. If you want to make sure that everything will go smoothly, we suggest reading this guide and using our tips on how to build a shed roof with overhang.
This guide will teach you:
The difference between gable roofs and shed roofs with overhangs
Different kinds of sheds (storage sheds, garden sheds)
The advantages and disadvantages of each type of shed
How to build your own DIY storage shed
The easiest way to build a shed roof is to make it slanted. But you can also build a shed roof without making it a slant-roof shed.
The easiest way to build a roof on your shed is to make it slanted. Building a slant-roof shed is pretty easy and can be done with just basic carpentry skills and some basic tools.
However, if you want something more traditional, or if you don’t want to deal with the extra work of building a slant-roof shed, then you can still build a simple, gabled roof for your shed.
If you want to learn how to build both types of roofs for your garden shed, then read on!
A shed roof is a great way to add storage space in your yard, but there are a few things you need to know before you get started.
First of all, it’s important to choose the right materials for your shed roof. You’ll want to use something durable and long lasting that won’t rot or break down over time.
Some common choices include:
redwood
cedar shingles
cedar shakes
wood siding
sheet metal panels (steel)
The cheapest way to build a shed roof is with standard rafters. They’re easy to install, and they’re readily available at most home centers.
If you have access to a table saw or circular saw, you can cut your own rafters from 2x4s or 2x6s. If not, you can buy precut rafters at the home center or lumberyard.
To build a shed roof with overhang, start by laying out the rafters on top of the wall plates so that they overlap by about 1/3 of their length. Then attach them with 3-in. screws driven through countersunk pilot holes in the ends of each rafter into the top plate (Photo 1). The overhang will prevent rainwater from running under the roof (and into your walls).
For extra rigidity, you can also drill several 5/16-in. holes through each pair of overlapping rafters — just above them and just below them — and then drive 3-in. screws through these holes into the bottom plate (Photos 2 & 3).
I am building a shed and I need to build the roof with overhang.
How to build a shed roof with overhang?
I have already made the frame, but cannot figure out what I should do next. The frame is made of 2×4’s and plywood.
I want to know the cheapest way to build a shed roof with overhang. Please help me!
Building a shed roof with overhang is an easy and inexpensive DIY project. Here’s how to do it.
Building a shed roof with overhang is an easy and inexpensive DIY project. Here’s how to do it.
If you’re looking for a way to add an extra layer of protection for your garden tools, or just want to give your shed some style, adding an overhang can be a great way to do it. An overhang can be very simple — just a few boards nailed together — or more complex and substantial, depending on the size of your shed and whether or not you plan on adding a decking area. Either way, building an overhang for your shed will make it look much better and last longer (not to mention protect it from the elements).
The easiest way to build a shed roof is with pre-made trusses. These are available from most building supply stores. They come in different sizes and lengths, as well as styles.
You can also buy plans on the Internet that will show you how to build your own shed roof. This will take more time and effort, but will save you some money.
If you want to make your own trusses, there are many different ways of doing this. You can use plywood or metal for the pieces, depending on what type of material suits your purpose best.
Make sure that you include an overhang on each side of your shed roof so that rainwater does not collect and cause problems inside your shed.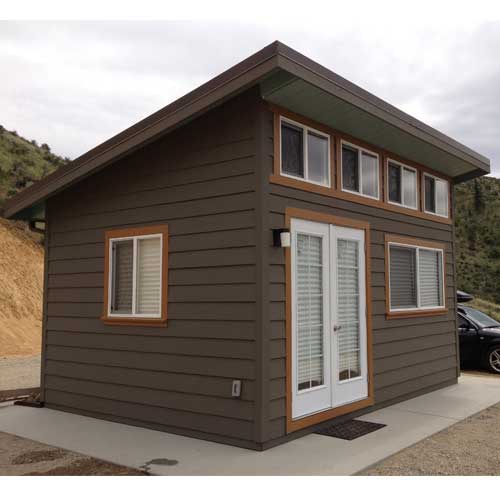
The easiest way to build a shed roof is with a pre-made kit. These kits are sold at most home improvement stores and include everything you need to get the job done. They usually come with trusses and rafters, along with all of the hardware needed to assemble them. Once you have your kit and your tools, you can build a shed quickly and easily.
Building Your Own Shed Roof
If you decide to build your own shed roof, it will take longer but it will also save you money. The first step is to determine what kind of material you want for your roofing material. You can choose from asphalt shingles, metal tiles and even wood shingles or shakes. Next, measure the length of each piece of wood that will make up the roof frame before cutting it down with a saw or other power tool. Nail the pieces together according to their length and nail them into place on top of each other so that they form an A-frame shape in the middle of each side of your shed. Then secure metal flashing over all seams where two pieces meet so that water doesn’t leak into the shed when it rains or snows heavily.