How to build a wood bed frame
Building a wood bed frame is a pretty complex project that takes more than just basic woodworking knowledge and skills. Therefore, before you start building one, it’s important to assess your current skill level and only then set the project in motion.
As I was building my first ever bed a couple of years ago, how to build a king size bed frame out of wood, how to build a bed frame from scratch, I realized that building a wood bed frame is not as simple as it sounds. There are certain things you should know to build the best wood bed frame for your room.

How to build a wood bed frame
When you’ve decided to build a new bed frame, the first thing you need is a plan. The second thing you need is wood.
Here’s how to build a king size bed frame out of wood.
Wood bed frames are easy to make and can be customized to fit your needs perfectly. You can build simple beds or more complex ones with multiple levels, headboards and footboards. If you’re careful about your measurements and cut the pieces correctly, it should take less than two hours to assemble these pieces of furniture on your own.
Materials needed:
– Wood (for example pine)
– Screws
– Nails
How to Build a King Size Bed Frame Out of Wood
If you are looking for a new bed frame, but don’t want to pay retail prices for something that you can make yourself, then this article is for you. Making your own bed frame is a great way to save money and still have the bed of your dreams. In this article we will show you how to build a king size bed frame out of wood.
This king size bed frame is made from pine lumber and it uses pocket holes for strength and stability. If you don’t have a pocket hole jig or would like more information on how to use one, check out our Pocket Holes 101 article!
Materials:
– 2 – 8′ 2x6s (for headboard)
– 2 – 8′ 1x6s (for footboard)
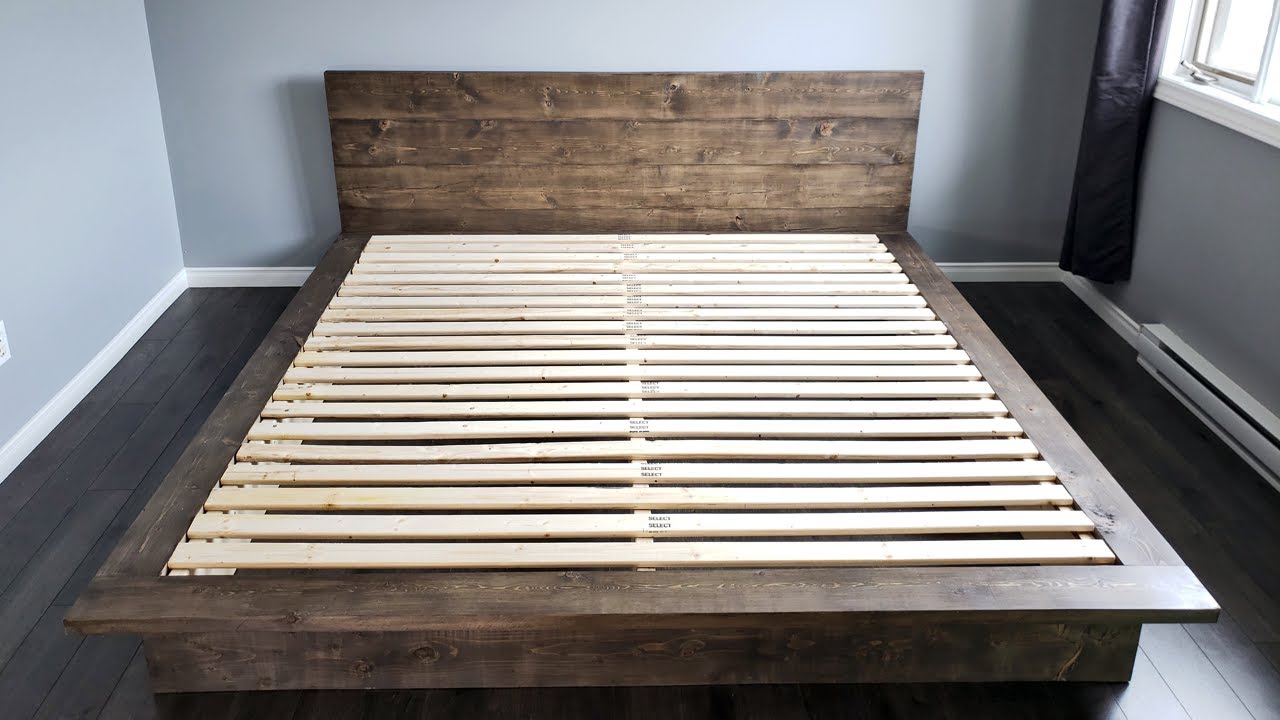
– 4 – 8′ 1x4s (for slats)
– 1 – 4′ x 4′ x 1/2″ plywood sheet (for base rails)
– 2 – 3″ x 3″ x 36″ furring strips (for base rails)
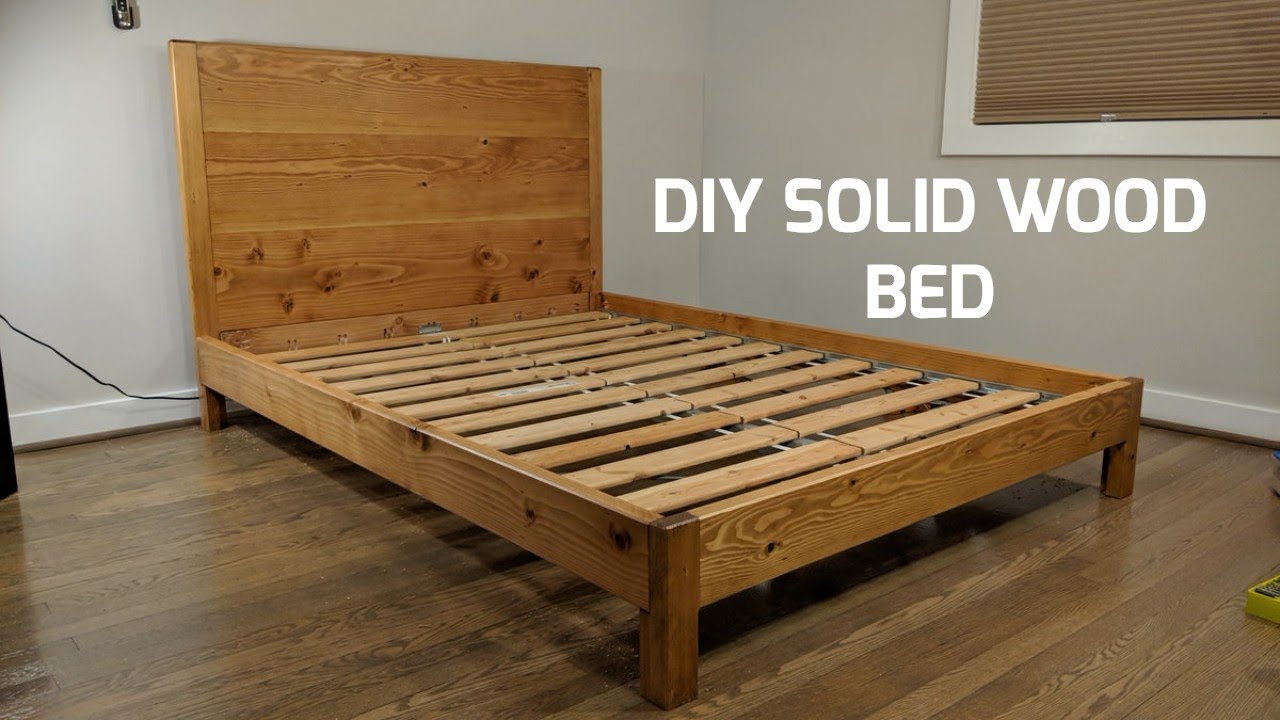
How to Build a Wood Bed Frame
A wood bed frame is a great way to add a little extra style to your bedroom. And it’s surprisingly easy to build yourself, too.
Here’s how to build a king size bed frame out of wood:
Step 1: Choose Your Materials
Wood is the most common material used in bed frames, but you can also choose metal, plastic or even bamboo. You’ll need enough lumber for the headboard and footboard, plus another piece for the center rails (the horizontal pieces that connect them). When choosing lumber, remember that standard 2x4s are actually 1½” x 3½”, so use those if possible. If not, you’ll have to make some adjustments later on when assembling your frame.
Step 2: Cut Your Pieces
Lay out all your lumber together on the floor and measure out exactly how many inches long each piece needs to be. For example, if you’re making a king-size bed with four posts at each corner and two center rails connecting them horizontally at about 24″ apart (for a total width of 84″), then each post should be 36″ long and so should each rail — just divide by 4 to get the correct length for each post
Building a bed frame is easy. In fact, if you’ve ever built a piece of furniture, you can build a bed frame. And building a king-size bed frame is even easier than building a standard-size one.
You should be able to build this king-size frame in about two hours. You’ll need:
A circular saw or table saw (optional)
A drill/driver and bits
A good crosscut handsaw or jigsaw (optional)
A cordless drill/driver for driving screws (optional)
If you’re looking for a way to build your own bed frame, here are some tips and instructions to help you get started.
Building a bed frame can be as simple or complex as you want it to be. Some people just like the look of a simple box spring and mattress set on the floor with no headboard or footboard, while others prefer more elaborate designs with curves, shapes and even storage features.
The first step in building a new bed is choosing what type of wood you’ll use for your project. You want something that’s strong enough to hold up your mattress, but also lightweight so it’s easy to move around if necessary.
The next step is determining how much space you have available in your bedroom for your new frame. If you’re going for an elaborate design with lots of curves and angles that require multiple pieces of wood, consider purchasing longer pieces of lumber so that you don’t have to cut them down later on. You’ll also want enough wood left over so that there’s room to drill holes for attaching your headboard or footboard later on in the process.

How to build a king size bed frame out of wood.
Step 1: Cut the Legs and Rails
Cut the legs and rails to length. The dimensions are shown in the materials list. The legs are 5/4 x 8″ x 35-3/8″. The rails are 5/4 x 6″ x 38-1/2″.
Step 2: Drill Pilot Holes and Assemble the Frame
Mark each leg 3-1/2″ down from one end and make a mark on both sides of the leg 3-1/2″ from this mark. Align the two marks on both sides of the leg, then drill pilot holes through each end of all four legs. Attach one rail to each leg with 4″ carriage bolts, washers, and nuts. Repeat for all four legs using two rails per leg (four total). Use a square as a guide to align each assembly square before driving each bolt home fully.
How to build a king size bed frame out of wood
Building a king size bed is not that difficult. You just need some basic carpentry skills and a few pieces of wood. Here are the steps you need to follow:
Measure your mattress and then mark the dimensions on a piece of plywood. Cut it with a jigsaw.
Cut two more pieces of plywood for the headboard and footboard. They should be about 3 inches longer than the mattress, so that you can screw them into place later.
Attach the headboard and footboard to each end of your box spring using screws. Make sure that these pieces are flush with each other at both ends.
Take one more piece of plywood and attach it to your headboard so that it covers most of its length; do this by drilling holes through both layers and inserting screws from below through these holes into the first layer as well as into any remaining holes on that layer from earlier steps when attaching other parts. Attach another piece in the same manner over your footboard as well.
This is a guide on how to build a king size bed frame out of wood. If you’re looking for a simple and easy way to build your own bed, then this is the right article for you.
You’ll need some basic tools and materials before you can start building the frame. There are two types of wood that are commonly used in building bed frames: pine and oak. Pine is less expensive than oak but doesn’t last as long. Here’s what you need:
Wood glue
Hammer
Nails or screws
2x4s (8 feet long)
2x6s (10 feet long)
The king size bed frame is big and heavy. It’s a lot of work to build one, but it can be done with some basic tools and materials.
Here are some tips for building your own king size bed frame:
– Use 2x4s for the legs, which will give you more support than a 1×4 or a 2×2. You’ll also need at least one 2×8 board for the top rail and baseboard trim.
– Cut all of your pieces to size before you begin assembly. This will save time and frustration down the road!
– Use wood screws instead of nails or other fasteners that require drilling holes in your wood. You don’t want to chance splitting your pieces or getting them crooked.
– Assemble each section separately before attaching them together, so you can easily move them around as needed during construction. That will make it easier to align everything properly once everything is put together.
So you want to build a bed frame? It’s not as hard as you might think. You can make a sturdy, attractive bed frame that will last for years with just a few tools and materials.
Here’s how:
Step 1: Cut the wood for your bed frame using a circular saw and miter saw. Use pine boards if possible; they’re cheap and easy to work with. Cut four pieces of 1″ x 8″ pine to make the legs of your bed frame — two at 84 inches long, one at 64 inches long and one at 40 inches long. Cut two pieces of 2″ x 4″ pine to make the side rails — one at 84 inches long and one at 64 inches long. You’ll also need two pieces of 2″ x 4″ pine for the top rails — one at 84 inches long and one at 64 inches long.
Step 2: Attach the legs to the rails using wood glue and construction screws (or nails). Make sure all of your joints are flush before driving in any nails or screws so that everything fits together properly when it’s done! The best way to do this is by making sure that everything is square before you start affixing things together permanently.